Breeding and Raising the Ghost Shrimp
Palaeomonetes patulous
By: Corydora_FREAK
All photos by author except as noted
Adult Male Ghost Shrimp
The Ghost Shrimp has been a staple in the aquarium hobby for many years, and I am always hearing questions on how to get them to breed in an aquarium. I have had great success not only getting them to breed, but also raising the fry, which seems to be the most challenging part of it all.
The Ghost shrimp is really a ready spawner in the home aquarium, but like any animal, conditions need to be right or you will not get anything. I keep my Ghost Shrimp in a 10 gallon tank all to themselves simply because these small animals are prey to almost all tropical fish, and they will not produce eggs if they feel threatened.
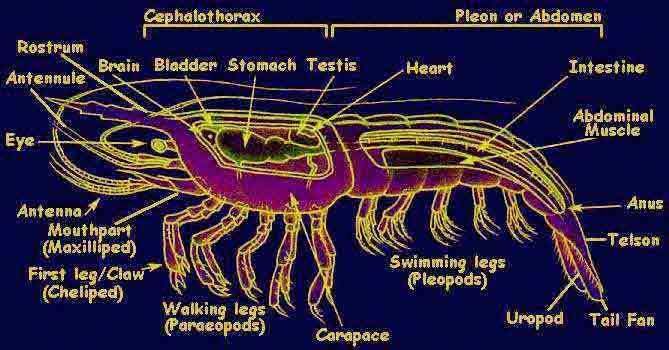
Anatomy
Before we get started lets review on some Ghost Shrimp biology.
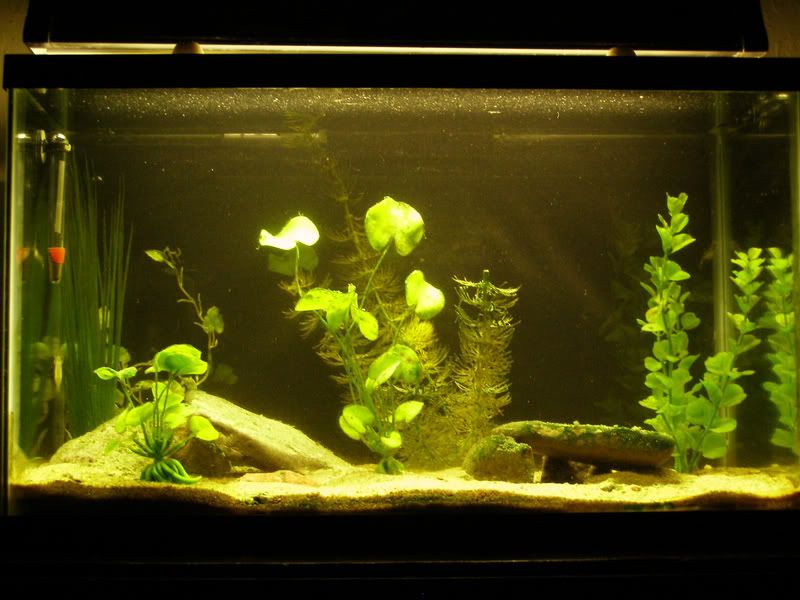
The Shrimp Tank

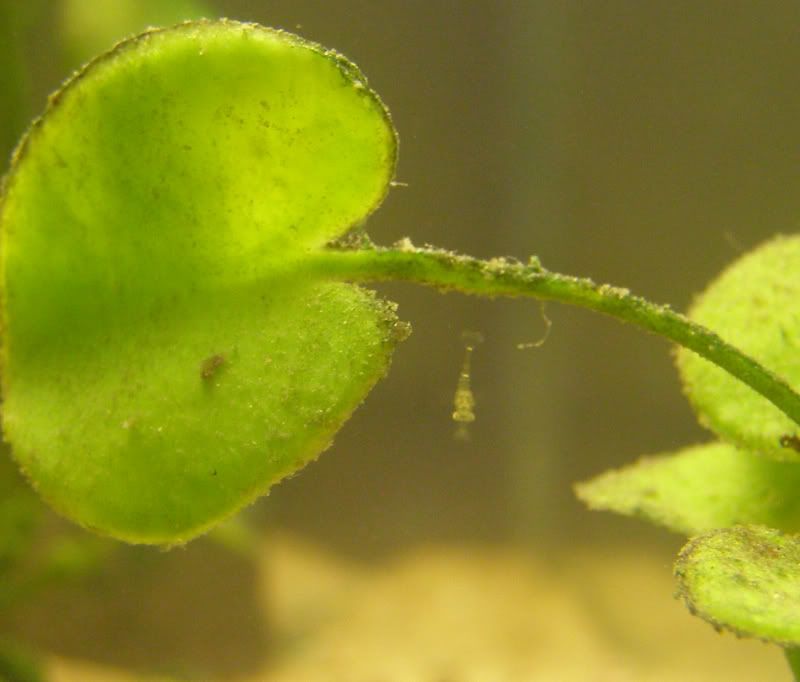
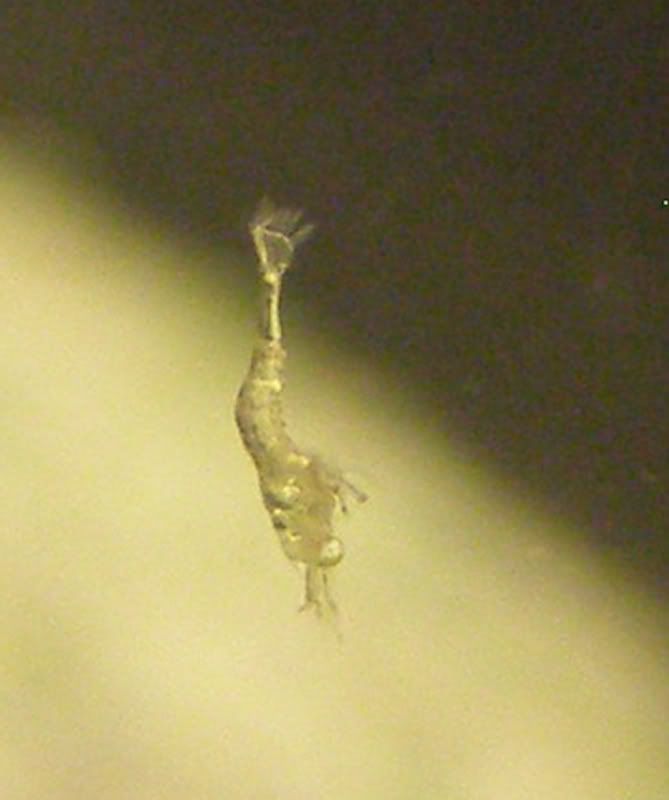
Larval Shrimp
Getting Started
The reproductive cycle will not begin if you don’t have 4 things for the shrimp
Security: they wont breed if they are threatened by predators
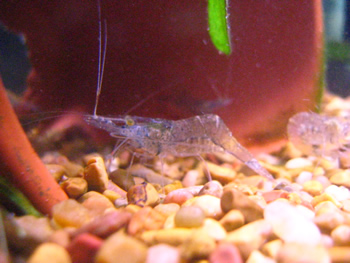
Males and Females: Seems obvious right? Can you sex your shrimp? Well Yes, you can! And it’s rather easy! Although it is almost impossible until the shrimp are full grown. The female has a much larger body size full grown, she will max out at about an inch and a quarter, while males stay much smaller at about 3 quarters of an inch, and they also have a much slimmer body style, the females tail and pleopods will be much larger to accommodate the eggs. Unlike most fish, you can have a relatively low number ratio of males to females. I have 1 male fertilize 2 females.
The Water parameters: As with breeding any fish or invertebrate, you need 0 Ammonia, Nitrite, and as close to zero as possible on Nitrates. Shrimp are very delicate and need matured substrate and clean water to thrive and in turn, breed. The temperature needs to be 73-78 degrees Fahrenheit or 20-30 degrees Celsius. Keep the salinity low, I use one teaspoon of aquarium salt for 10 gallons. Very small amounts.
Readiness of Food( but feed properly!) The shrimp breed in the abundant seasons in the wild, if they have plentiful food sources it will greatly increase the chances of eggs to be laid. I cant stress enough the importance of NOT overfeeding!! A great way to give your shrimp plenty to eat is to let the algae grow on the ornaments like rocks( but you don’t have to let it overgrow, a little is all you need, not a forest!), they love to eat it off, although they are NOT entirely algae eaters and you will need to supplement their diet with protein and calcium to and that can be found in bottom feeder pellets. Remember these are small animals and a little goes a very long way. Take a quarter of the bottom pellet and crush it the size of crumbs, then put it in, that amount will sustain my 3 full grown shrimp for about 2 days depending on how hungry they are
So, we have eggs!
The female shrimp will lay anywhere from 20 to 30 eggs and carry them on her enlarged pleopods for 21 to 24 days. The eggs look like little black dots under all over her pleopods. When fertilized the eggs will become clear. Over the 21 day incubation period, the eggs will stay clear until the last 4 or 5 days, then you will actually notice little black dots on each of the eggs. This is the larval shrimps eyes! When you can see eyes, you know the hatch is coming very soon. Turn off your filter and pull out the intake tube if you have a power filter as the young shrimp will be sucked to their doom, they need still waters.

Notice the black eggs under her abdomen.
After the 21 to 24 days the eggs will then hatch and the young will still be clung to the female’s pleopods. The mother will swim up into the water column and rapidly paddle her pleopods to release the larval shrimp into the water column, she will not release all the young at once because she is vulnerable to predators in the wild, and lets face it they think they are in the wild. She will make many intervals to shake loose all the larvae. Do not disturb her if you happen to witness this as she will take cover instead of releasing the young and they will die under her if they stay for more than an hour as they need to get out and get food.
Larvae!!!
So the eggs hatched and the larvae are out and free swimming! Alright, now the real work has begun. Before I continue I would like to state that a third or more of the larvae may die from lack of food or predation by parents. Now, the fry have enough energy to survive without food for only an hour or two, they are not born with yolk like fish to survive, and they will immediately start to forage for food. The larvae have no legs (paraeopods) so they will be swimming in a vertical position with heads down. They are extremely small, but will grow very fast. They will double in size in 4 to 6 days depending on the nutrition they receive. What do the larvae eat? The answer, infusoria. Infusoria are bacteria that digest plant matter and will be plentiful in a cycled mature tank with algae or live plants. They are highly nutritious and will be the larvae’s food, after just 2 days they will then begin to eat algae as well. Mine tend to love the thin layer on the glass, they can use their extremely tiny budding legs to hold on to the algae and eat their fill. Remember they cant walk, only propel themselves along with their tails. They are usually skittish and if you walk by and get close they will use their tails to jet them away from you to the nearest cover. Its rather funny to see the little specks dashing around so fast. Remember, keep clean water since the filter is disconnected, do a 10 percent water change every day! Now lets take a look at some larval shrimp!
This shrimp is brand new, as it was shaken loose from its mother only 6 hours ago, all your larvae will adopt this up and down position as they have no legs to walk, They will drift around engulfing food as it drifts by. This is why its crucial that you have the tank for the shrimp only, these floating young would be easy targets for fish.
Up close with the larvae, see the underdeveloped legs the absence of pleopods. Don’t worry, they will come in extremely quickly, in anywhere from 3 to 5 days.
Grow shrimp, grow!
Ok so your shrimp larvae have survived the first crucial week! Ok, the hard part is over! Now after 1 week they are called juveniles. Their legs will have grown in and they will now forage as miniature adults. If you think you lose one because you cant find it, don’t fret, remember these creatures are extremely small still, and remember their coolest quality, transparency. So don’t worry they are probably just hiding. After 2 weeks have passed they will be miniature copies of the adults and will grow rapidly. They will reach adulthood in 5 weeks.
Well I would like to thank you for taking the time to read this, I sure hope it helps and if you have any further questions drop me a line, though PM or this thread.

Mother with 2 week old juvenile __________________
from Corydora_FREAK at FishForums.com:

Palaeomonetes patulous
By: Corydora_FREAK
All photos by author except as noted
Adult Male Ghost Shrimp
The Ghost Shrimp has been a staple in the aquarium hobby for many years, and I am always hearing questions on how to get them to breed in an aquarium. I have had great success not only getting them to breed, but also raising the fry, which seems to be the most challenging part of it all.
The Ghost shrimp is really a ready spawner in the home aquarium, but like any animal, conditions need to be right or you will not get anything. I keep my Ghost Shrimp in a 10 gallon tank all to themselves simply because these small animals are prey to almost all tropical fish, and they will not produce eggs if they feel threatened.
Anatomy
Before we get started lets review on some Ghost Shrimp biology.
The Shrimp Tank
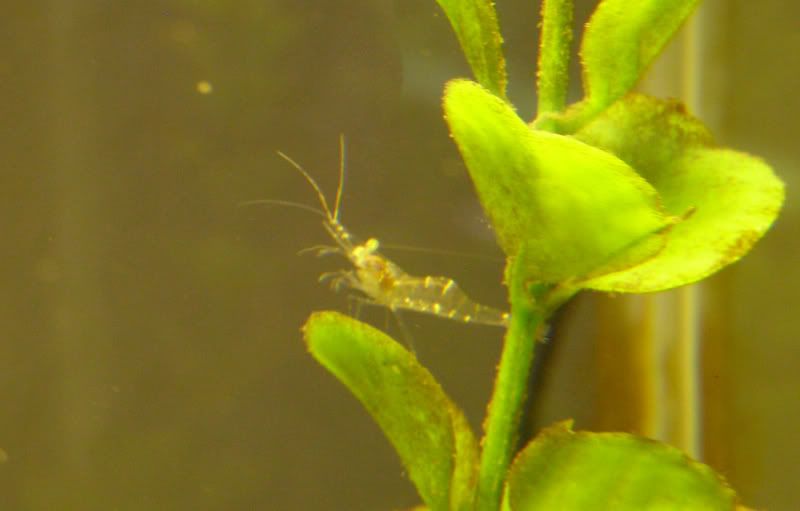
Larval Shrimp
Getting Started
The reproductive cycle will not begin if you don’t have 4 things for the shrimp
Security: they wont breed if they are threatened by predators
Males and Females: Seems obvious right? Can you sex your shrimp? Well Yes, you can! And it’s rather easy! Although it is almost impossible until the shrimp are full grown. The female has a much larger body size full grown, she will max out at about an inch and a quarter, while males stay much smaller at about 3 quarters of an inch, and they also have a much slimmer body style, the females tail and pleopods will be much larger to accommodate the eggs. Unlike most fish, you can have a relatively low number ratio of males to females. I have 1 male fertilize 2 females.
The Water parameters: As with breeding any fish or invertebrate, you need 0 Ammonia, Nitrite, and as close to zero as possible on Nitrates. Shrimp are very delicate and need matured substrate and clean water to thrive and in turn, breed. The temperature needs to be 73-78 degrees Fahrenheit or 20-30 degrees Celsius. Keep the salinity low, I use one teaspoon of aquarium salt for 10 gallons. Very small amounts.
Readiness of Food( but feed properly!) The shrimp breed in the abundant seasons in the wild, if they have plentiful food sources it will greatly increase the chances of eggs to be laid. I cant stress enough the importance of NOT overfeeding!! A great way to give your shrimp plenty to eat is to let the algae grow on the ornaments like rocks( but you don’t have to let it overgrow, a little is all you need, not a forest!), they love to eat it off, although they are NOT entirely algae eaters and you will need to supplement their diet with protein and calcium to and that can be found in bottom feeder pellets. Remember these are small animals and a little goes a very long way. Take a quarter of the bottom pellet and crush it the size of crumbs, then put it in, that amount will sustain my 3 full grown shrimp for about 2 days depending on how hungry they are
So, we have eggs!
The female shrimp will lay anywhere from 20 to 30 eggs and carry them on her enlarged pleopods for 21 to 24 days. The eggs look like little black dots under all over her pleopods. When fertilized the eggs will become clear. Over the 21 day incubation period, the eggs will stay clear until the last 4 or 5 days, then you will actually notice little black dots on each of the eggs. This is the larval shrimps eyes! When you can see eyes, you know the hatch is coming very soon. Turn off your filter and pull out the intake tube if you have a power filter as the young shrimp will be sucked to their doom, they need still waters.
Notice the black eggs under her abdomen.
After the 21 to 24 days the eggs will then hatch and the young will still be clung to the female’s pleopods. The mother will swim up into the water column and rapidly paddle her pleopods to release the larval shrimp into the water column, she will not release all the young at once because she is vulnerable to predators in the wild, and lets face it they think they are in the wild. She will make many intervals to shake loose all the larvae. Do not disturb her if you happen to witness this as she will take cover instead of releasing the young and they will die under her if they stay for more than an hour as they need to get out and get food.
Larvae!!!
So the eggs hatched and the larvae are out and free swimming! Alright, now the real work has begun. Before I continue I would like to state that a third or more of the larvae may die from lack of food or predation by parents. Now, the fry have enough energy to survive without food for only an hour or two, they are not born with yolk like fish to survive, and they will immediately start to forage for food. The larvae have no legs (paraeopods) so they will be swimming in a vertical position with heads down. They are extremely small, but will grow very fast. They will double in size in 4 to 6 days depending on the nutrition they receive. What do the larvae eat? The answer, infusoria. Infusoria are bacteria that digest plant matter and will be plentiful in a cycled mature tank with algae or live plants. They are highly nutritious and will be the larvae’s food, after just 2 days they will then begin to eat algae as well. Mine tend to love the thin layer on the glass, they can use their extremely tiny budding legs to hold on to the algae and eat their fill. Remember they cant walk, only propel themselves along with their tails. They are usually skittish and if you walk by and get close they will use their tails to jet them away from you to the nearest cover. Its rather funny to see the little specks dashing around so fast. Remember, keep clean water since the filter is disconnected, do a 10 percent water change every day! Now lets take a look at some larval shrimp!
This shrimp is brand new, as it was shaken loose from its mother only 6 hours ago, all your larvae will adopt this up and down position as they have no legs to walk, They will drift around engulfing food as it drifts by. This is why its crucial that you have the tank for the shrimp only, these floating young would be easy targets for fish.
Up close with the larvae, see the underdeveloped legs the absence of pleopods. Don’t worry, they will come in extremely quickly, in anywhere from 3 to 5 days.
Grow shrimp, grow!
Ok so your shrimp larvae have survived the first crucial week! Ok, the hard part is over! Now after 1 week they are called juveniles. Their legs will have grown in and they will now forage as miniature adults. If you think you lose one because you cant find it, don’t fret, remember these creatures are extremely small still, and remember their coolest quality, transparency. So don’t worry they are probably just hiding. After 2 weeks have passed they will be miniature copies of the adults and will grow rapidly. They will reach adulthood in 5 weeks.
Well I would like to thank you for taking the time to read this, I sure hope it helps and if you have any further questions drop me a line, though PM or this thread.
Mother with 2 week old juvenile __________________
from Corydora_FREAK at FishForums.com:


 water up the lift tube and into the tank. As water is moved out of the lift tube, it is replaced with water from under the filter plate, which in turn pulls water through the gravel where it is cleaned. The gravel it self provides